Circadian Lightning is the concept of adapting the light in your home to follow the human circadian rhythm. So the light will change from warm white in the morning, to cold white in the afternoon, and back to warm white in the evening. My goal was to imitate this concept at my desk while working from home. I found this nice Home Assistant plugin that I’m using. For the hardware I chose the Mi Smart Led Desk Lamp Pro – it runs an ESP32 and can easily be flashed with ESPHome.
The blog post is divided into four steps:
Hardware setup
I run the following hardware:
- Raspberry Pi running Home Assistant
- Mi Smart Led Desk Lamp Pro
- Esp-prog board for flashing the ESP32 with ESPHome
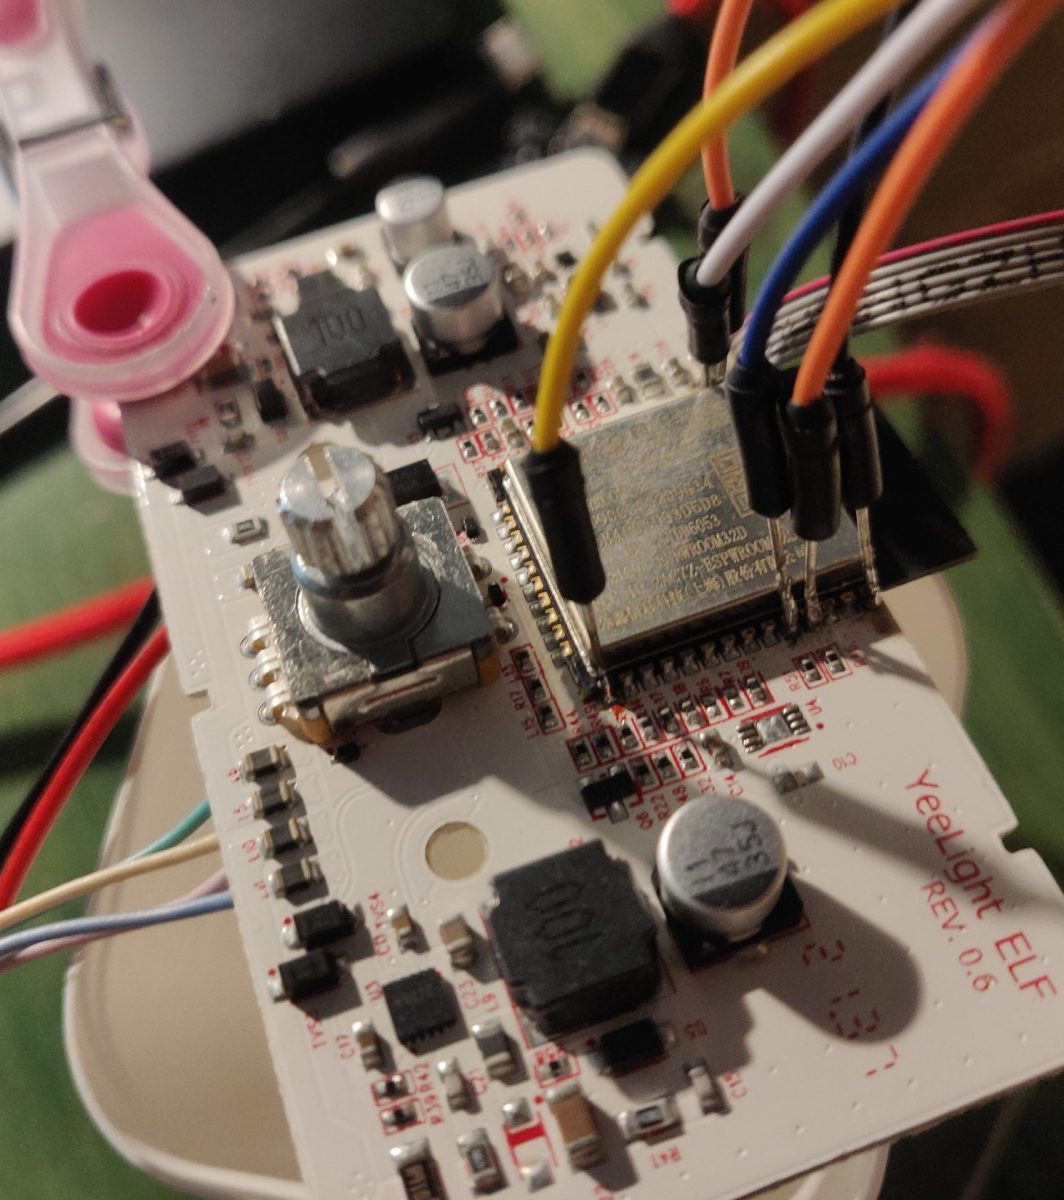
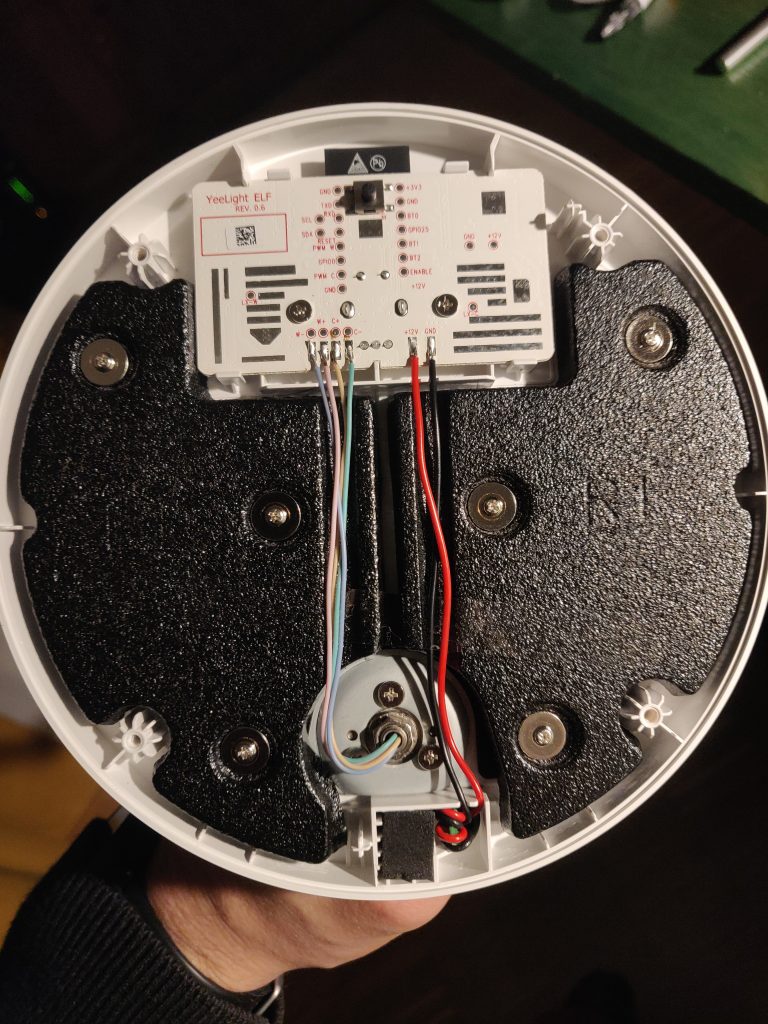
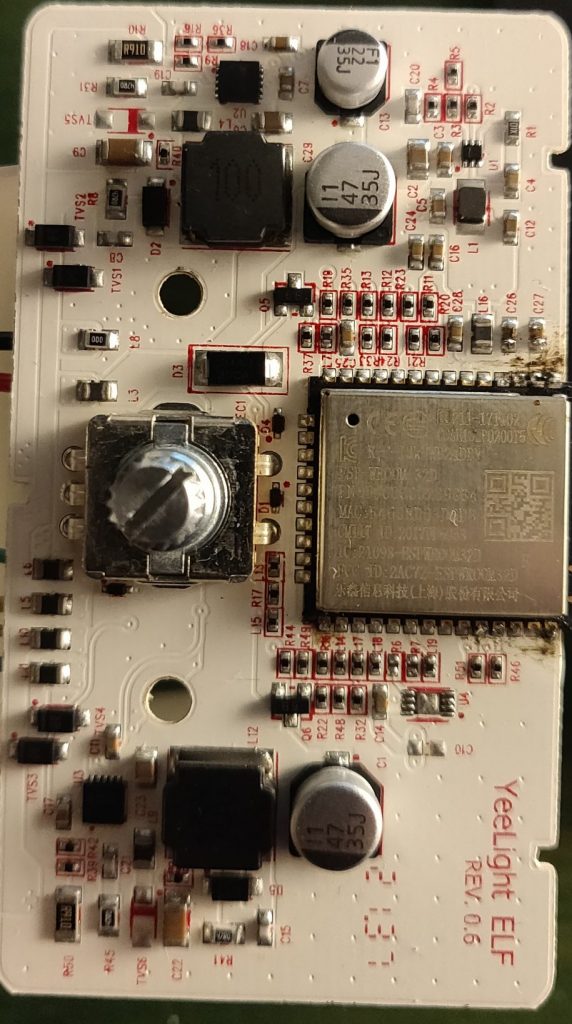
To open the lamp you have to remove 4 screws on the bottom which are under the rubber stickers. Then you can access the board with the ESP32 directly. The pins to flash the ESP32 are on the bottom and therefore there is no need to take the PCB out.

These pins are needed:
- TXD – transmit pin for UART
- RXD – receive pin for UART
- GPIO 0 – set ESP32 to boot mode
- Enable – used to restart the microcontroller
- GND – Ground
- VDD – to apply voltage
If you are as smart as me and rip out one of the pads on the back you need to solder the pins directly to the chip. To reach the ESP32 remove the two screws on the back of the PCB and pop it out. This works fine too. Next, I connected all the pins to their corresponding pins on the esp-prog board.
Software setup
ESPHome has a standard configuration for the lamp which I used as a starting point. This configuration can’t be built on the Raspberry Pi. So I built the configuration on my laptop and uploaded it to the lamp. First I pulled the latest ESPHome Docker image
docker pull esphome/esphomeI run the docker container and access the ESPHome web interface.
docker run --rm --net=host -it esphome/esphome
Flashing it the first time, I downloaded the binary and uploaded it via the esp-prog. Once ESPHome is installed on the lamp I used the install wireless feature. If I want to update the firmware I run the docker container and paste the current (or new) configuration as a new device. ESPHome picks it up, connects to it, and it can upload a new configuration.
Flash Mi Smart Led Desk Lamp Pro
Since I run ESPHome in an additional container I need to put in the Wifi credentials in clear text. I added two things to the default configuration:
- only sending commands if the value of the rotary sensor is not 0. Because the value is set back to 0 the default configuration sends each command twice.
- add a switch interface which can be changed with a double click on the physical knob on the lamp. If the switch is on the color temperature can’t be changed via the knob.
Here is the configuration file:
esphome:
  name: xiaomi-lamp-pro-1

esp32:
  board: esp32doit-devkit-v1
  framework:
    type: esp-idf
    version: recommended
    sdkconfig_options:
      CONFIG_FREERTOS_UNICORE: y
    advanced:
      ignore_efuse_mac_crc: true

# Enable logging
logger:
  level: VERBOSE

ota:
  password: "**************"

wifi:
  ssid: ************
  password: ************

# Enable fallback hotspot (captive portal) in case wifi connection fails
api:
  reboot_timeout: 0s

sensor:
  - platform: rotary_encoder
    id: rotation
    pin_a: GPIO26
    pin_b: GPIO27
    resolution: 2
    on_value_range:
      - below: -0.5
        then:
          - if:
              condition:
                and:
                - binary_sensor.is_on: on_off
                - sensor.in_range:
                    id: rotation
                    above: 0
                - switch.is_off: xiaomi_lamp_pro_1_circadian
              then:
                # If Button is pressed, change CW/WW
                - lambda: |-
                    auto min_temp = id(light1).get_traits().get_min_mireds();
                    auto max_temp = id(light1).get_traits().get_max_mireds();
                    auto cur_temp = id(light1).current_values.get_color_temperature();
                    auto new_temp = max(min_temp, min(max_temp, cur_temp + (x*20)));
                    auto call = id(light1).turn_on();
                    call.set_color_temperature(new_temp);
                    call.perform();
              else:
                # If Button is not pressed, change brightness
                - light.dim_relative:
                    id: light1
                    relative_brightness: !lambda |-
                      return x / 20.0;
          # Reset Rotation to 0
          - sensor.rotary_encoder.set_value:
              id: rotation
              value: 0
      - above: 0.5
        then:
          - if:
              condition:
                and:
                - binary_sensor.is_on: on_off
                - sensor.in_range:
                    id: rotation
                    above: 0
                - switch.is_off: xiaomi_lamp_pro_1_circadian
              then:
                # If Button is pressed, change CW/WW
                - lambda: |-
                    auto min_temp = id(light1).get_traits().get_min_mireds();
                    auto max_temp = id(light1).get_traits().get_max_mireds();
                    auto cur_temp = id(light1).current_values.get_color_temperature();
                    auto new_temp = max(min_temp, min(max_temp, cur_temp + (x*20)));
                    auto call = id(light1).turn_on();
                    call.set_color_temperature(new_temp);
                    call.perform();
              else:
                # If Button is not pressed, change brightness
                - light.dim_relative:
                    id: light1
                    relative_brightness: !lambda |-
                      return x / 20.0;
    on_value:
      then:
          # Reset Rotation to 0
          - sensor.rotary_encoder.set_value:
              id: rotation
              value: 0

binary_sensor:
  - platform: gpio
    id: on_off
    pin:
      number: GPIO33
      inverted: True
      mode: INPUT_PULLDOWN
    on_click:
      then:
        - light.toggle: light1
    on_double_click:
      then:
        - switch.toggle: xiaomi_lamp_pro_1_circadian


switch:
  - platform: template
    optimistic: true
    id:  xiaomi_lamp_pro_1_circadian
    name: "enable circadian ligthning xiaomi lamp pro 1"

output:
  - platform: ledc
    pin: GPIO2
    id: output_cw
    power_supply: power
    frequency: 9765Hz
  - platform: ledc
    pin: GPIO4
    id: output_ww
    power_supply: power
    frequency: 9765Hz

power_supply:
  - id: power
    pin: GPIO12
    enable_time: 0s
    keep_on_time: 0s

light:
  - platform: cwww
    id: light1
    default_transition_length: 0s
    constant_brightness: true
    name: "Mi Desk Lamp Pro"
    cold_white: output_cw
    warm_white: output_ww
    cold_white_color_temperature: 4800 K
    warm_white_color_temperature: 2500 K #2500k is the original value of the lamp. To correct binning for 2700k to look more like 2700k use 2650k instead
    restore_mode: RESTORE_DEFAULT_OFF
    gamma_correct: 1
Automation configuration
Now it’s time for magic. I installed the circadian lightning component and configured a switch in the configuration.yaml file. The color temperatures are within the limits of the lamp. As soon as the switch is turned on it controls the color temperature of the lamp. And as a result, I have circadian lightning at my desk
circadian_lighting:
  min_colortemp: 2500
  max_colortemp: 4800

switch:
  - platform: circadian_lighting
    name:  circadian_lighting_mi_desk_lamp_pro_1
    disable_brightness_adjust: true
    lights_ct:
      - light.mi_desk_lamp_pro_1
Now there are two individual switches, one on the lamp and one which controls the circadian lightning. The final step is to create an automation to synch both of them – so I can control the circadian lightning with the lamp itself.
alias: sync circadian lightning - xiaomi lamp pro
description: ""
trigger:
  - platform: device
    type: changed_states
    device_id: *******************
    entity_id: switch.enable_circadian_ligthning_xiaomi_lamp_pro
    domain: switch
condition: []
action:
  - if:
      - condition: device
        type: is_on
        device_id: *******************
        entity_id: switch.enable_circadian_ligthning_xiaomi_lamp_pro
        domain: switch
    then:
      - service: switch.turn_on
        data: {}
        target:
          entity_id: switch.circadian_lighting_circadian_lighting_mi_desk_lamp_pro
    else:
      - service: switch.turn_off
        data: {}
        target:
          entity_id: switch.circadian_lighting_circadian_lighting_mi_desk_lamp_pro
mode: single
Conclusion
I now enjoy circadian lightning at my desk. Controlling the brightness is still up to me since I might work late in the evening and don’t want to sit in the dark. It works great and I can already tell a difference in concentration during the day. The lamp itself is very bright and comfortable to work with. Considering I had Home Assistant already running and the esp-prog board is the solution quite affordable. You can find it new for around 60-70€ or buy a used one like myself since you won’t be able to claim a warranty after tinkering with it.