
When I started my bachelor’s degree I was looking for something to build myself. It was either building a 3D printer or a CNC cutter. I’m sure my roommates would have been super excited about a dusty and loud CNC but lucky for them I decided on a printer. When I started (2014) parts from china became available and open source software accessible. After weeks of researching, I decided one night to do my first purchase and bought the mechanical components for the first version.
The printer is still work in progress and probably always will be. But I’m happy how it turned out and if it comes to print quality it can easily compete with machines like Ultimaker and Ender printers. I had an Ultimaker 3 for a couple of weeks and print quality on my machine was at least as good as the one from the Ultimaker 3.
Currently, my printer has the following configuration:
- XY Core
- E3D v6 hotend as bowden setup
- SKR2 Big Tree Tech (runs Marlin) with front display
- Heated bed with a PEI sheet as the printing surface
- Ball screw for z-axis, linear ball bearing for x/ y axis
- Marlin Firmware
Overview
The main idea of the printer was to fit everything within a cubic shape and only have the Bowden setup and cable management sticking out. For the first version, I got a lot of inspiration from the first Sparkcube design. The printer is supposed to work without supervision once set up for a filament type is done. After several iterations (if I remember correctly it’s mechanical version number 7 now) the printer seems to be at a final stage.
Most of the time I’m using Octoprint which I installed on a separate Raspberry Pi. Following is the current state of the printer.
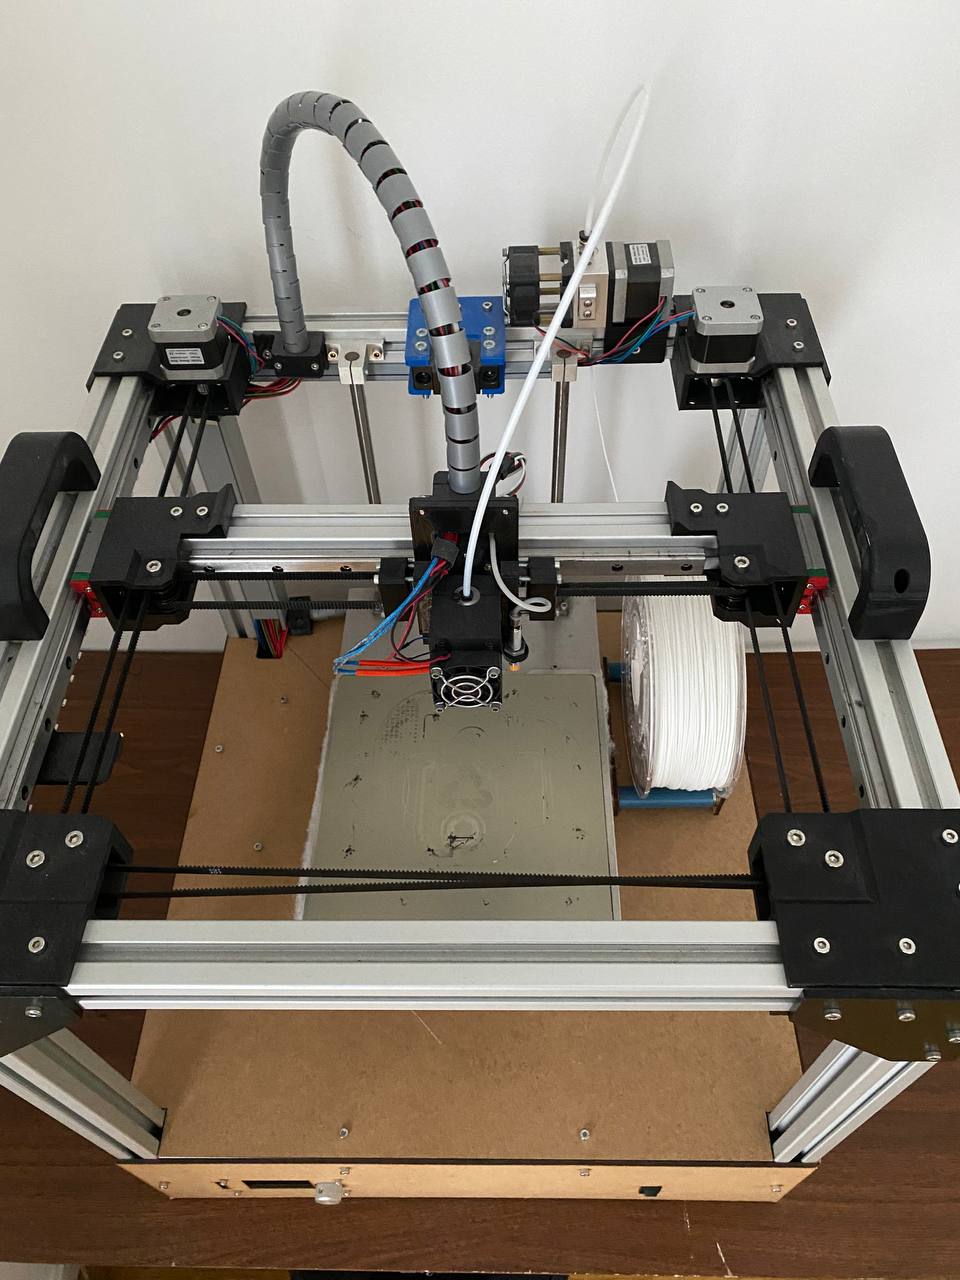
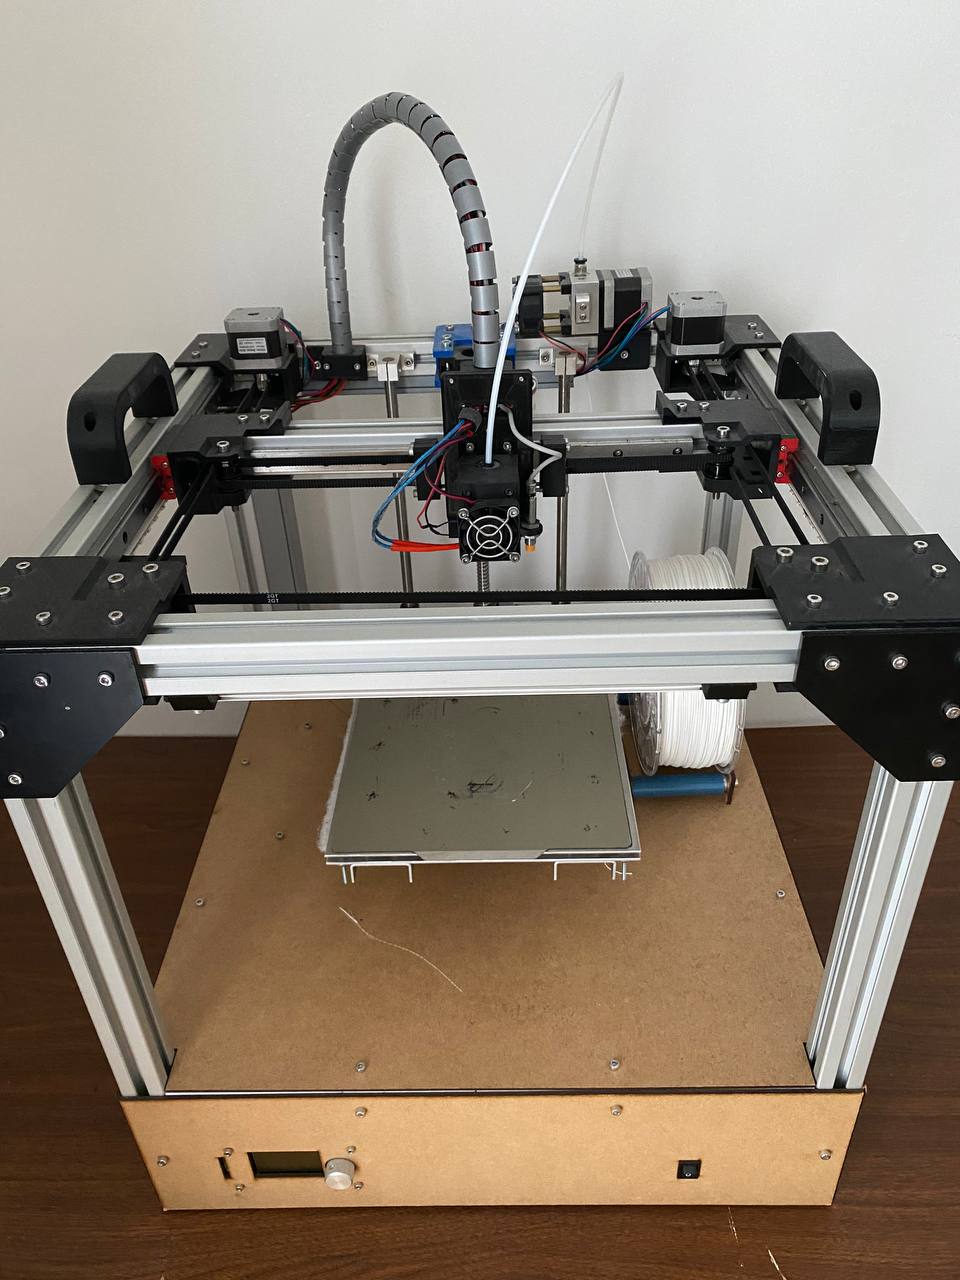
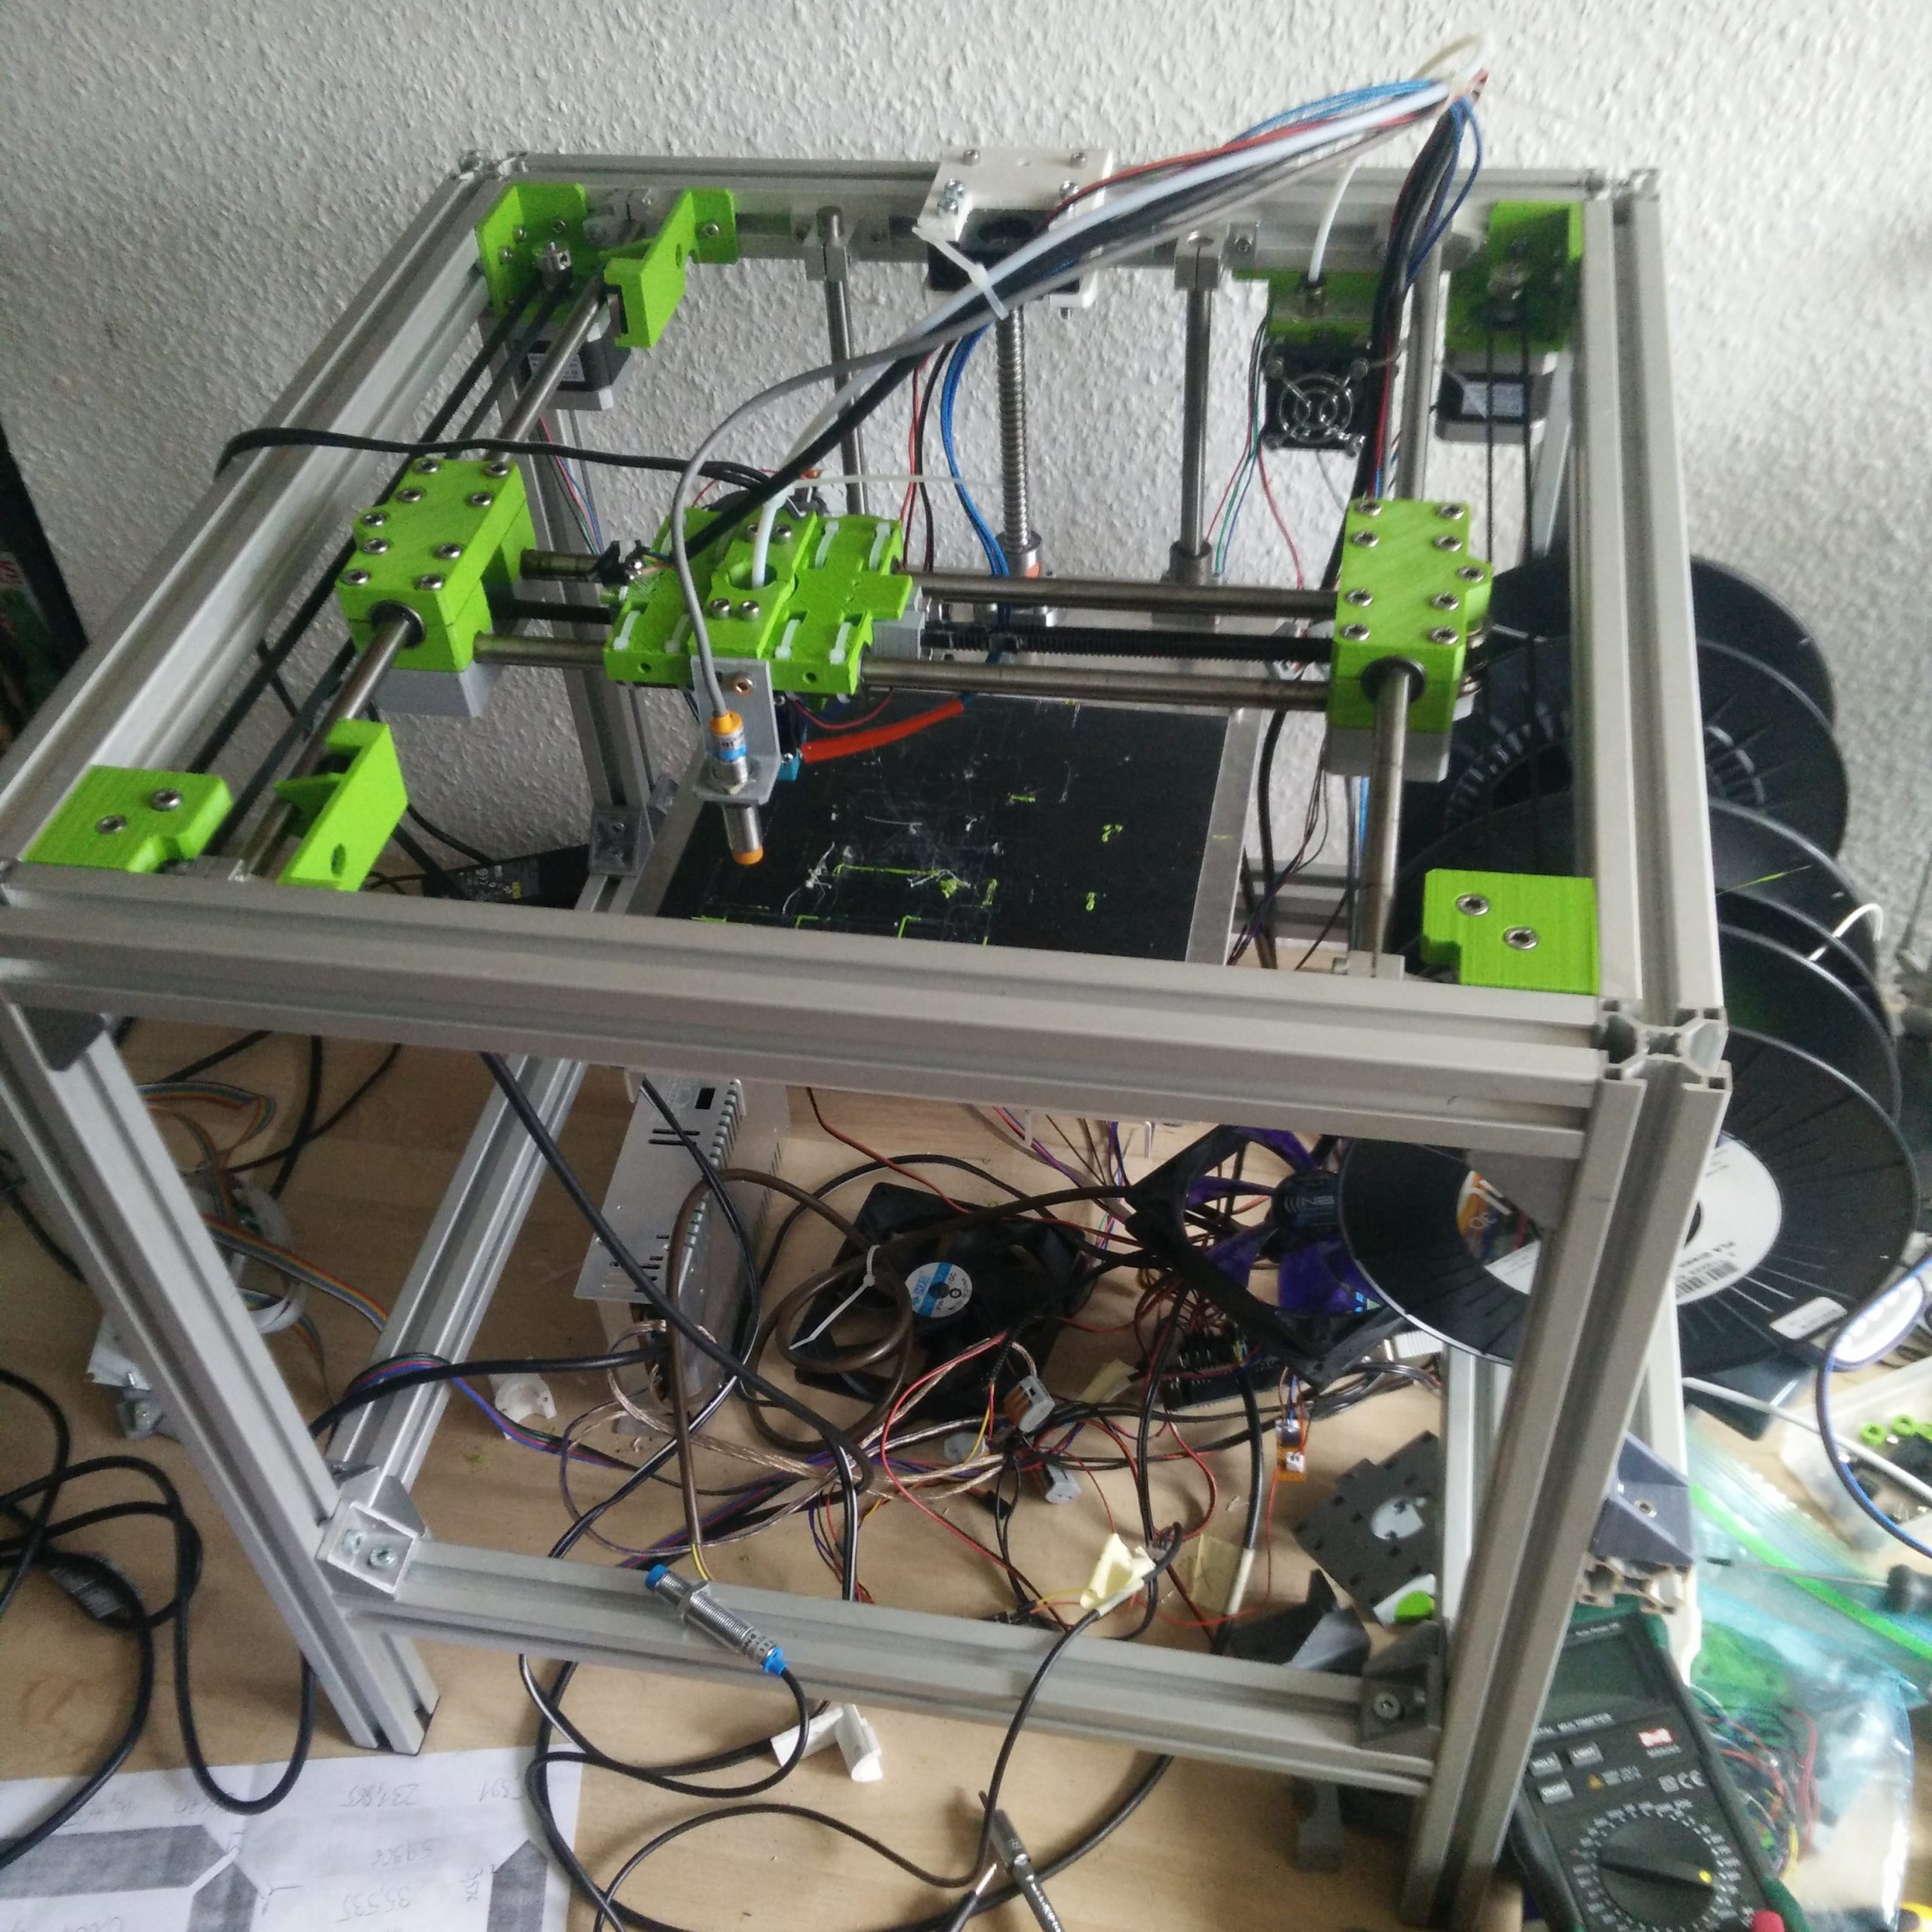
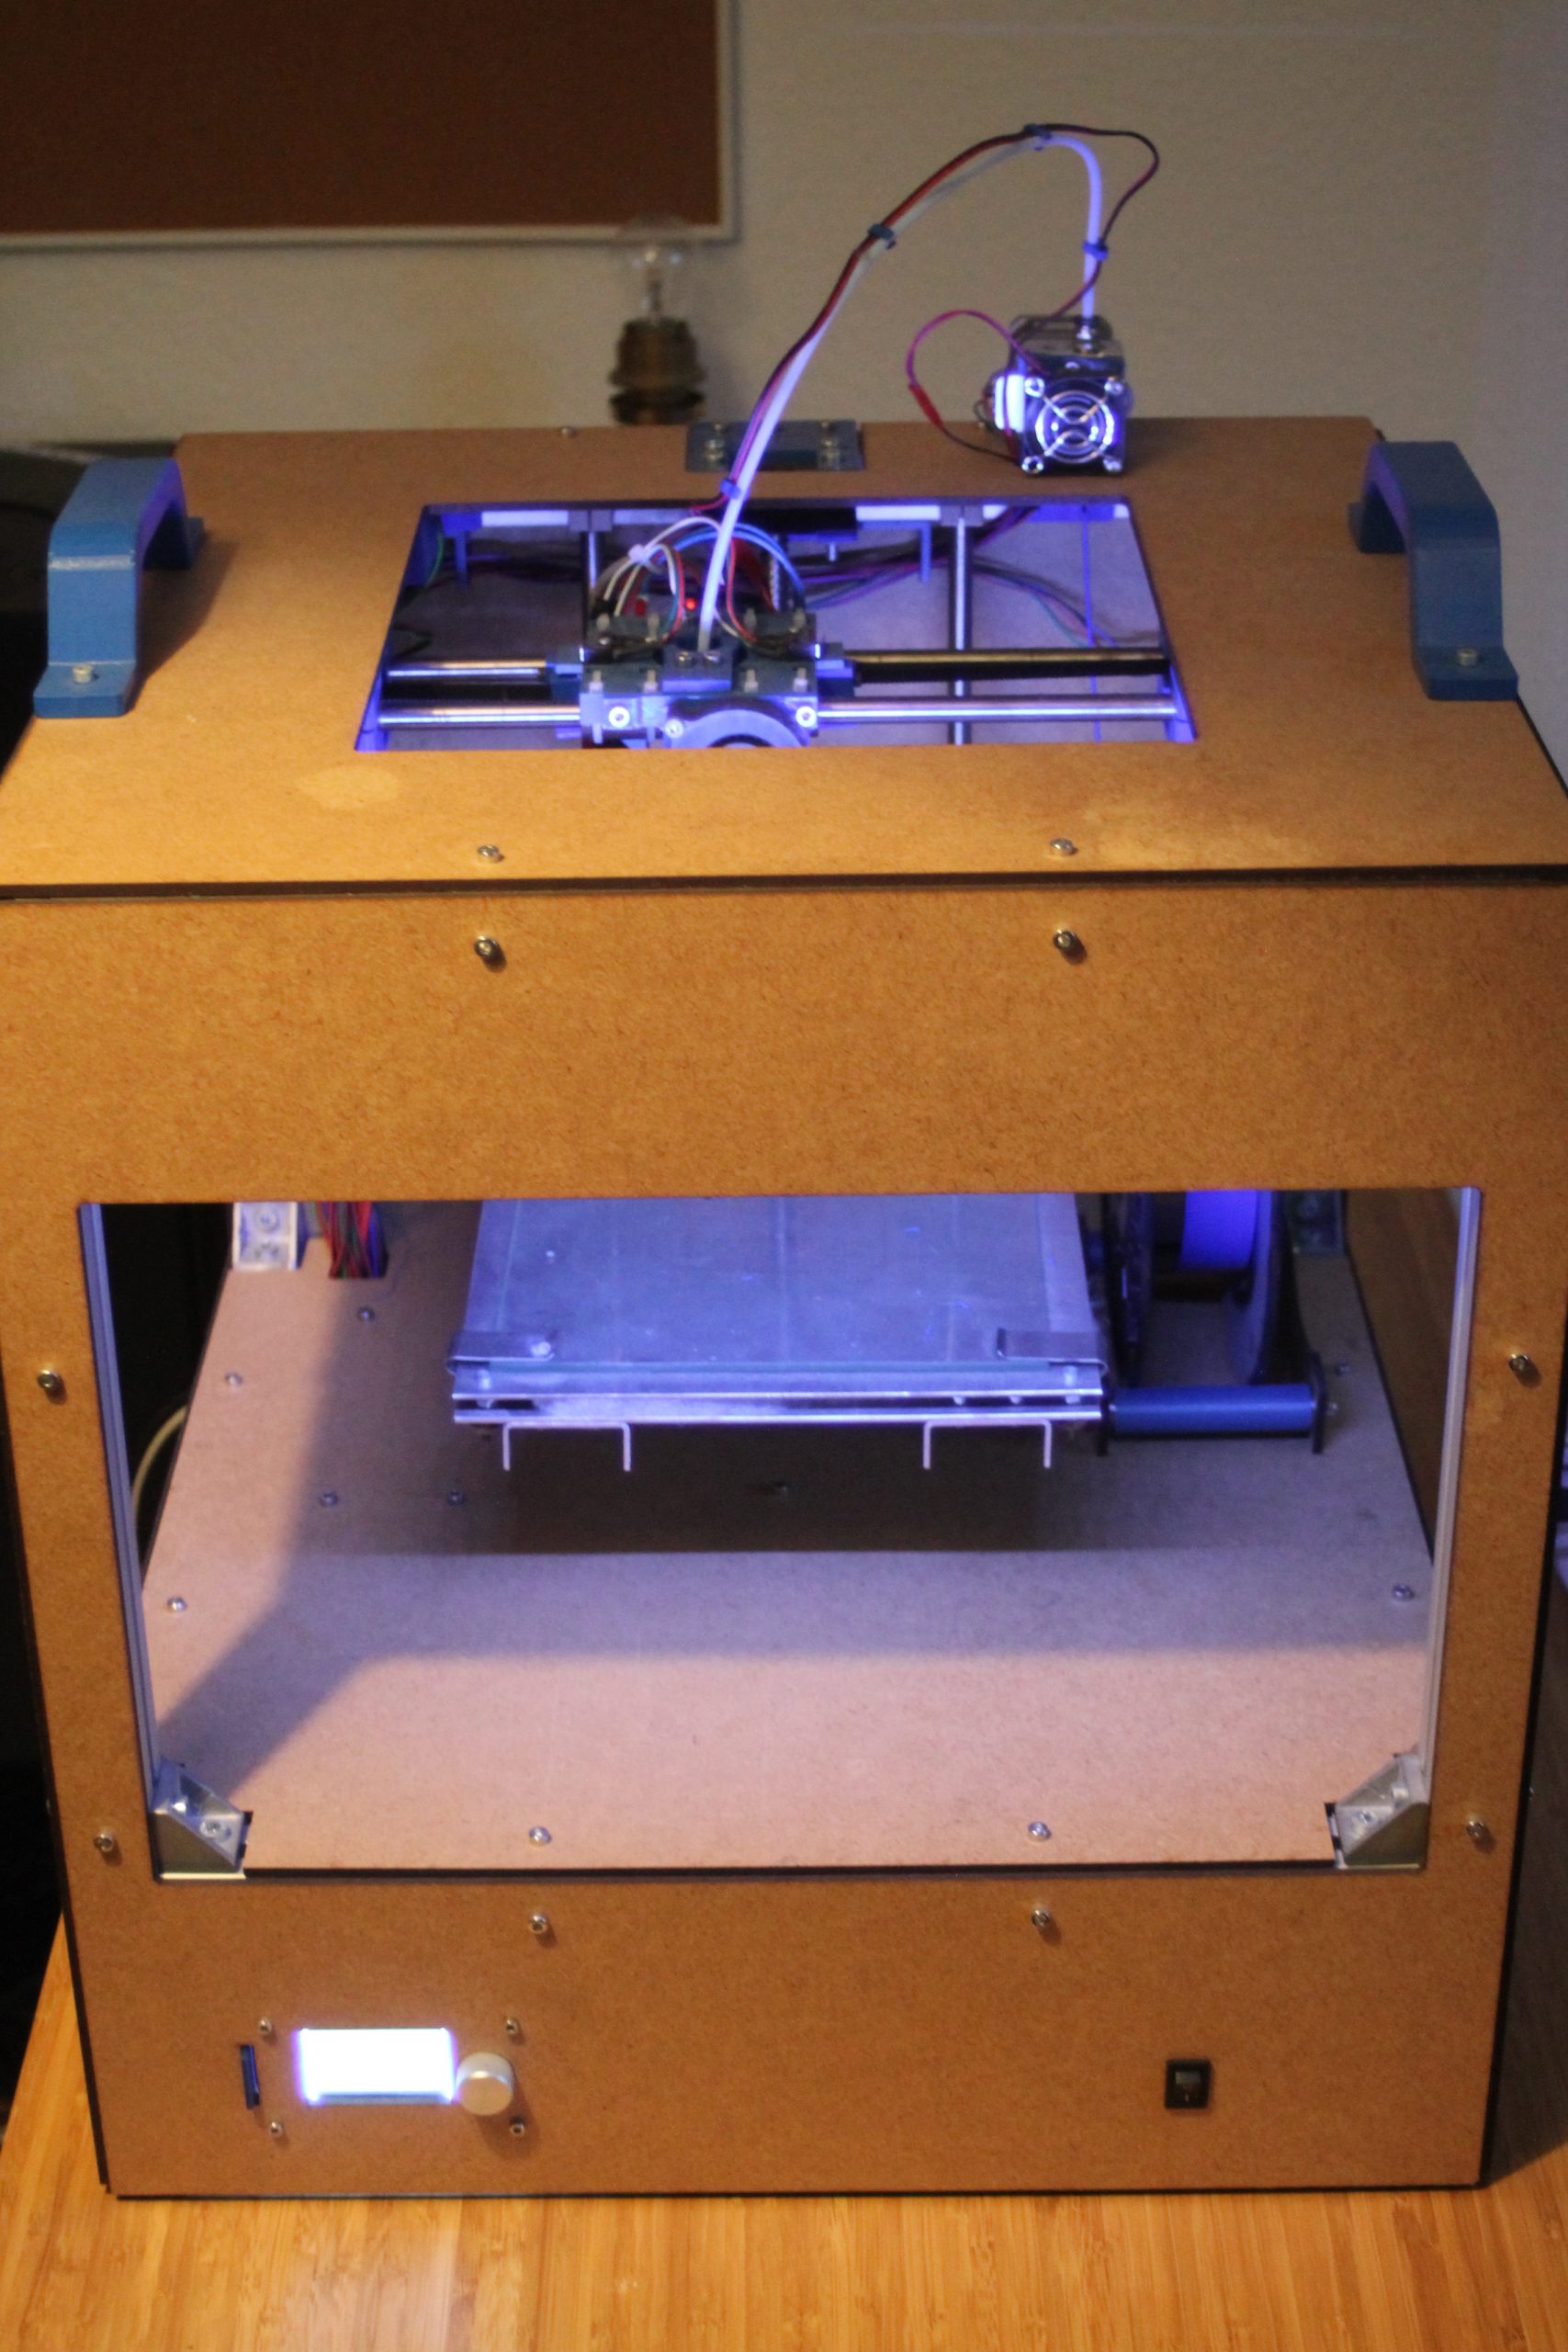
The structure consists of extruded aluminum profiles (30 x 30 mm). Laser-cut triangles reinforce the top corners. This makes the printer very rigid and I can attach things whenever I need to. All electronics are hidden with laser-cut wood panels. The front one holds the display with information about the status of the printer. Since everything is supposed to be inside the cubic shape – I placed the filament close to the z-axis platform
The printer uses linear rails for the x and y-axis. Both have a belt-driven xy core design. For z I chose linear ball bearings along two hardened steel rods. These bearings hold the printing bed. The stepper motor for z is placed under the wooden covers and attached is a ball bearing screw for moving the platform.
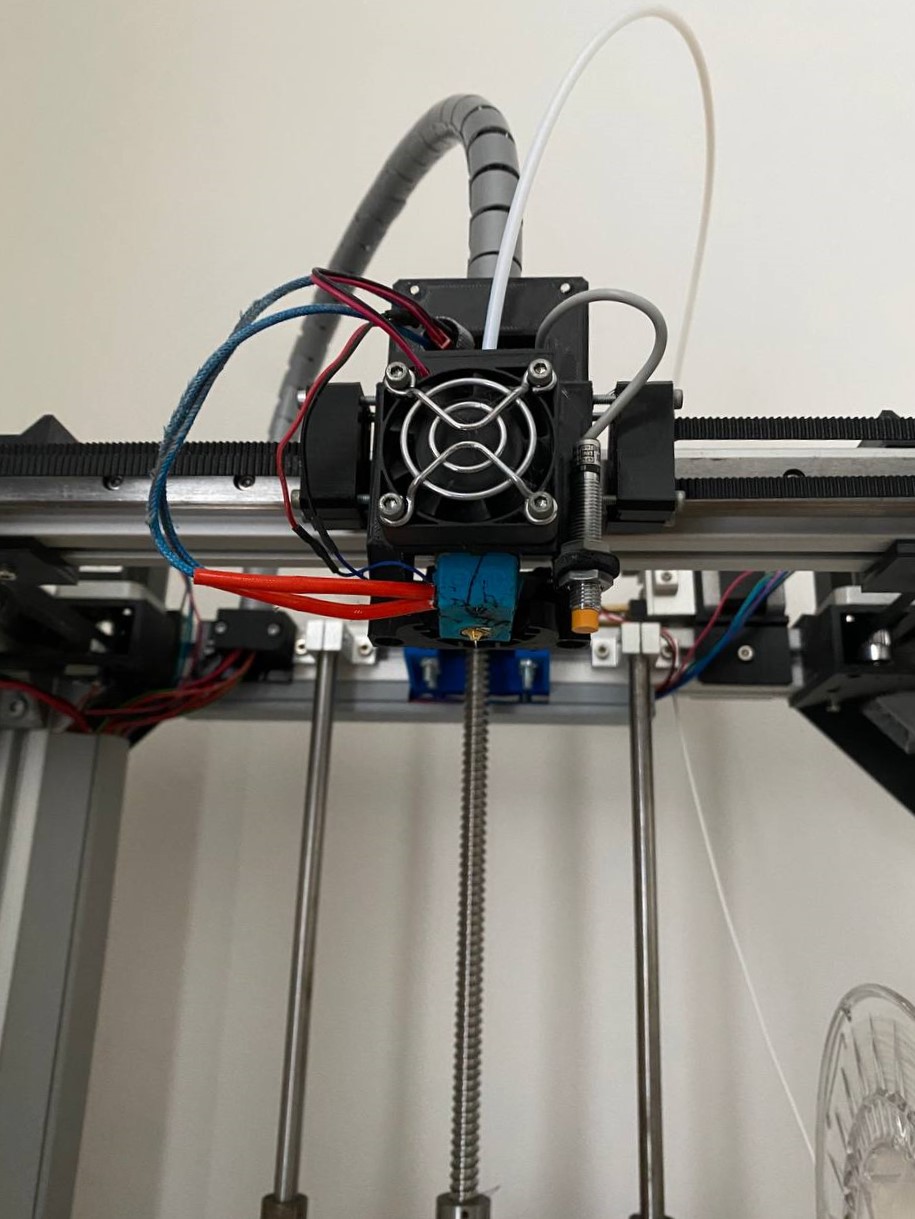
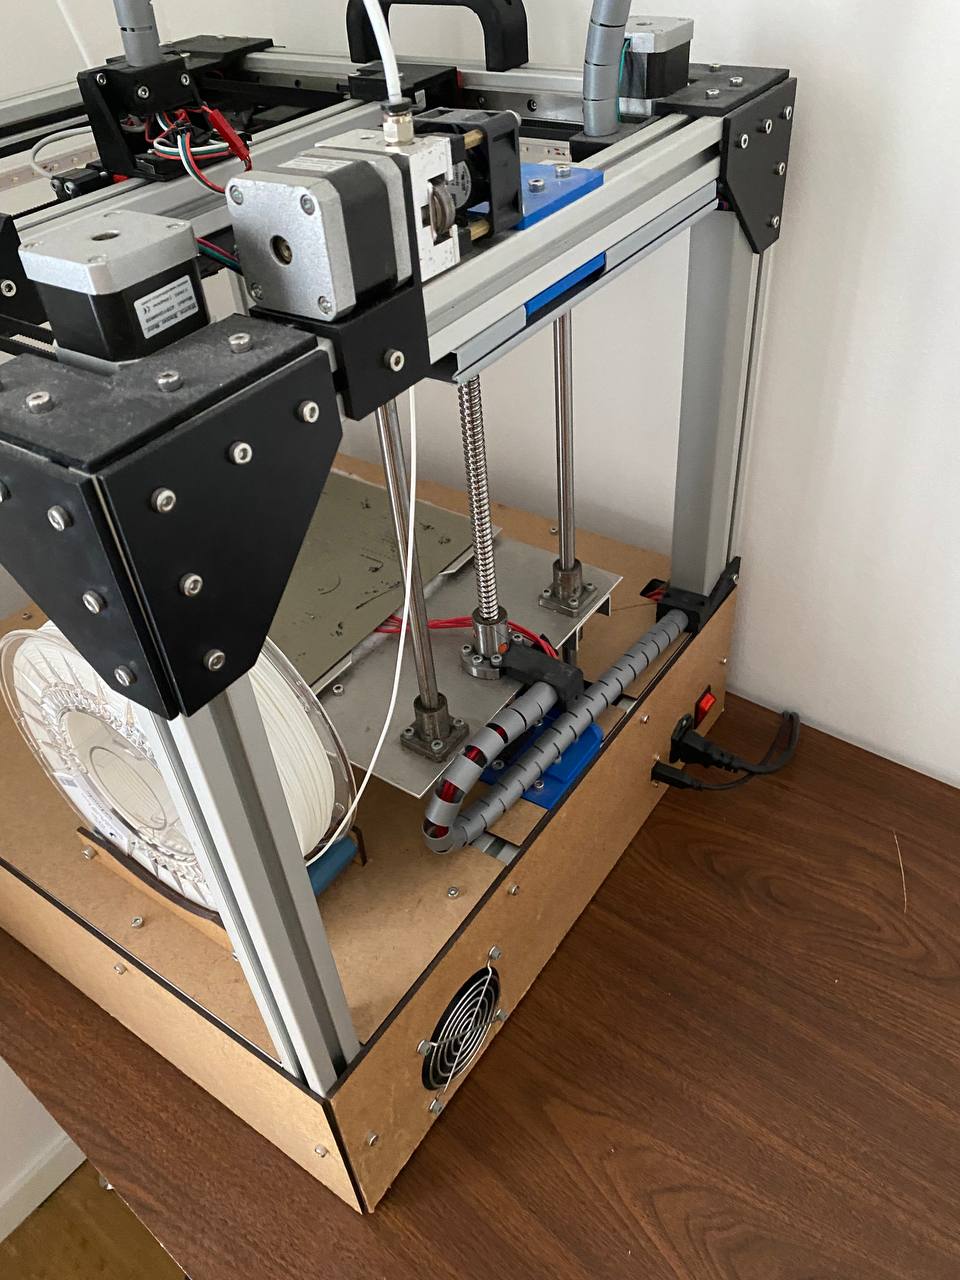
The hotend fixture is attached to one of the linear ball-bearing wagons. It has a inductive sensor for bed leveling. I perform the bed leveling step before every print to make sure that the first layer is the correct height. At the back, there is a fan, USB outlet, and power input. All cables are covered and have a protective sleeve if they are moving. The sleeving in combination with the wood covers are the main reason for the clean look of the printer.
Different versions since I started
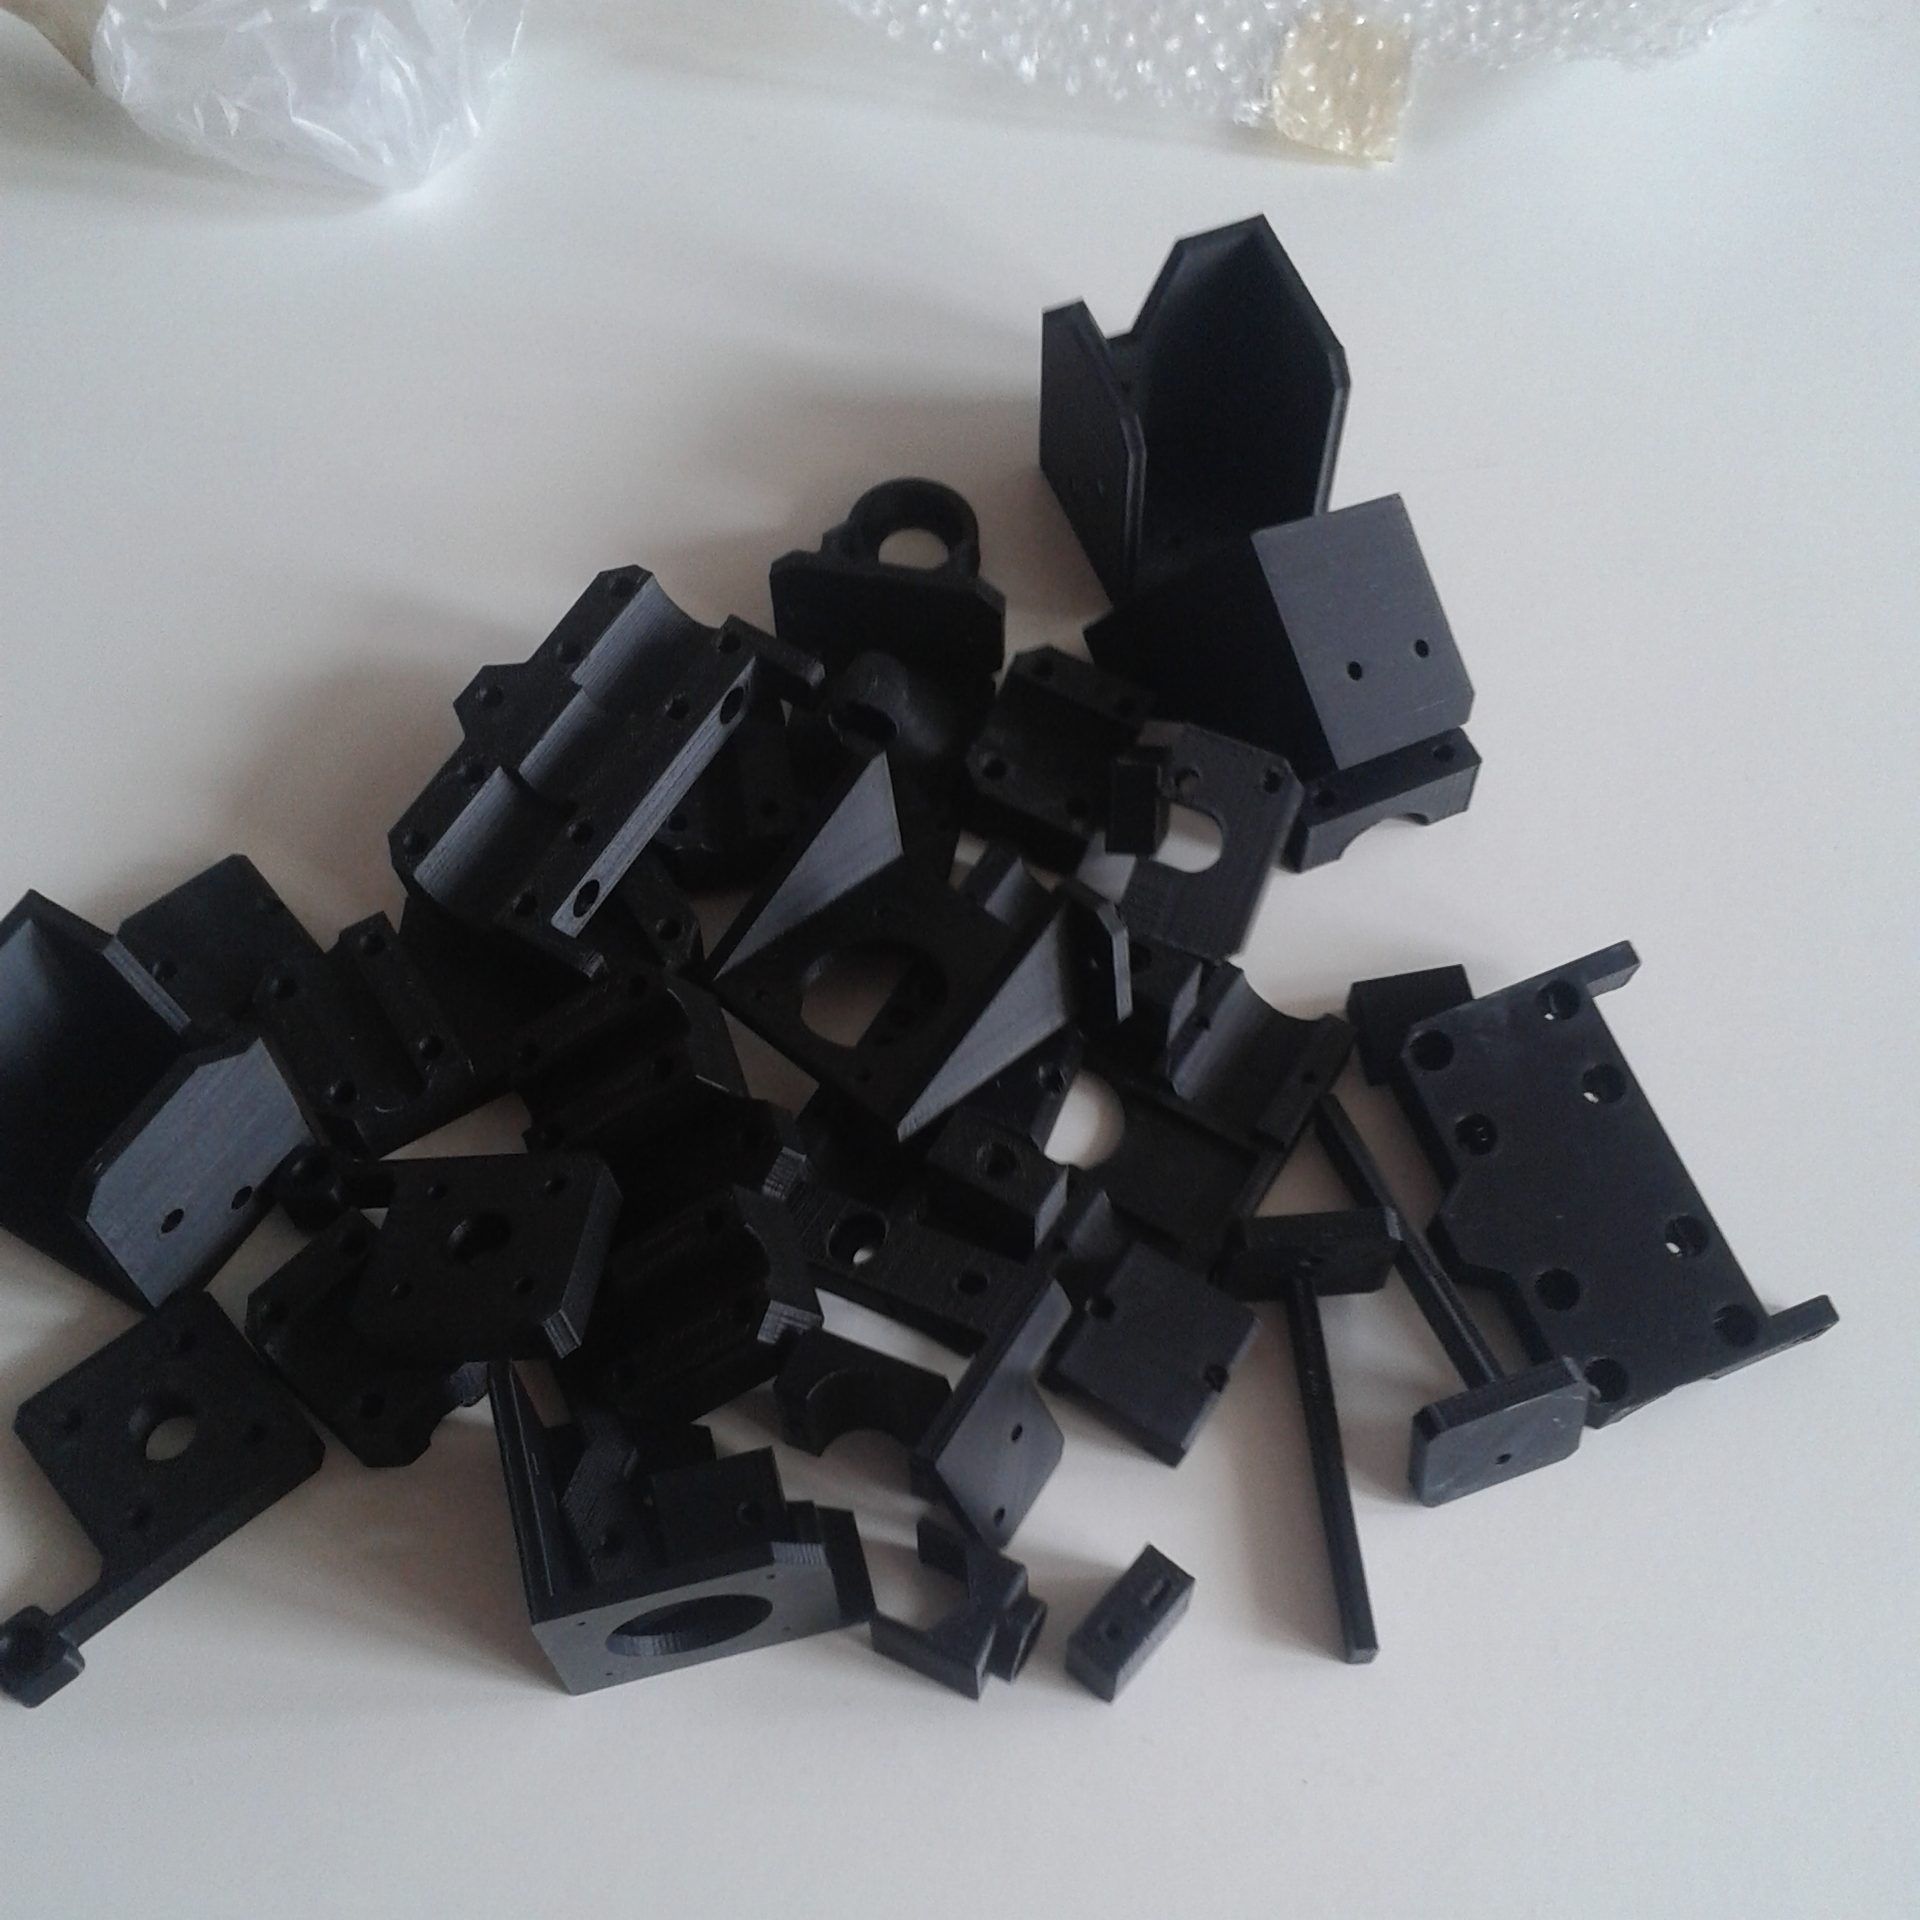
For designing the first mechanical version I taught myself how to do CAD drawings and found someone on the internet to print the first iteration. I still remember how exciting everything was since I had no idea if my ideas worked at all. And of course, I did lots of things I’d do differently today. For example, I started with hall sensors as end stops because I thought it needs to be super accurate. Now I’m using mechanical end-stops and I never had any issues with them. I started with a used PC power supply and switched to a larger 12v power supply later on.
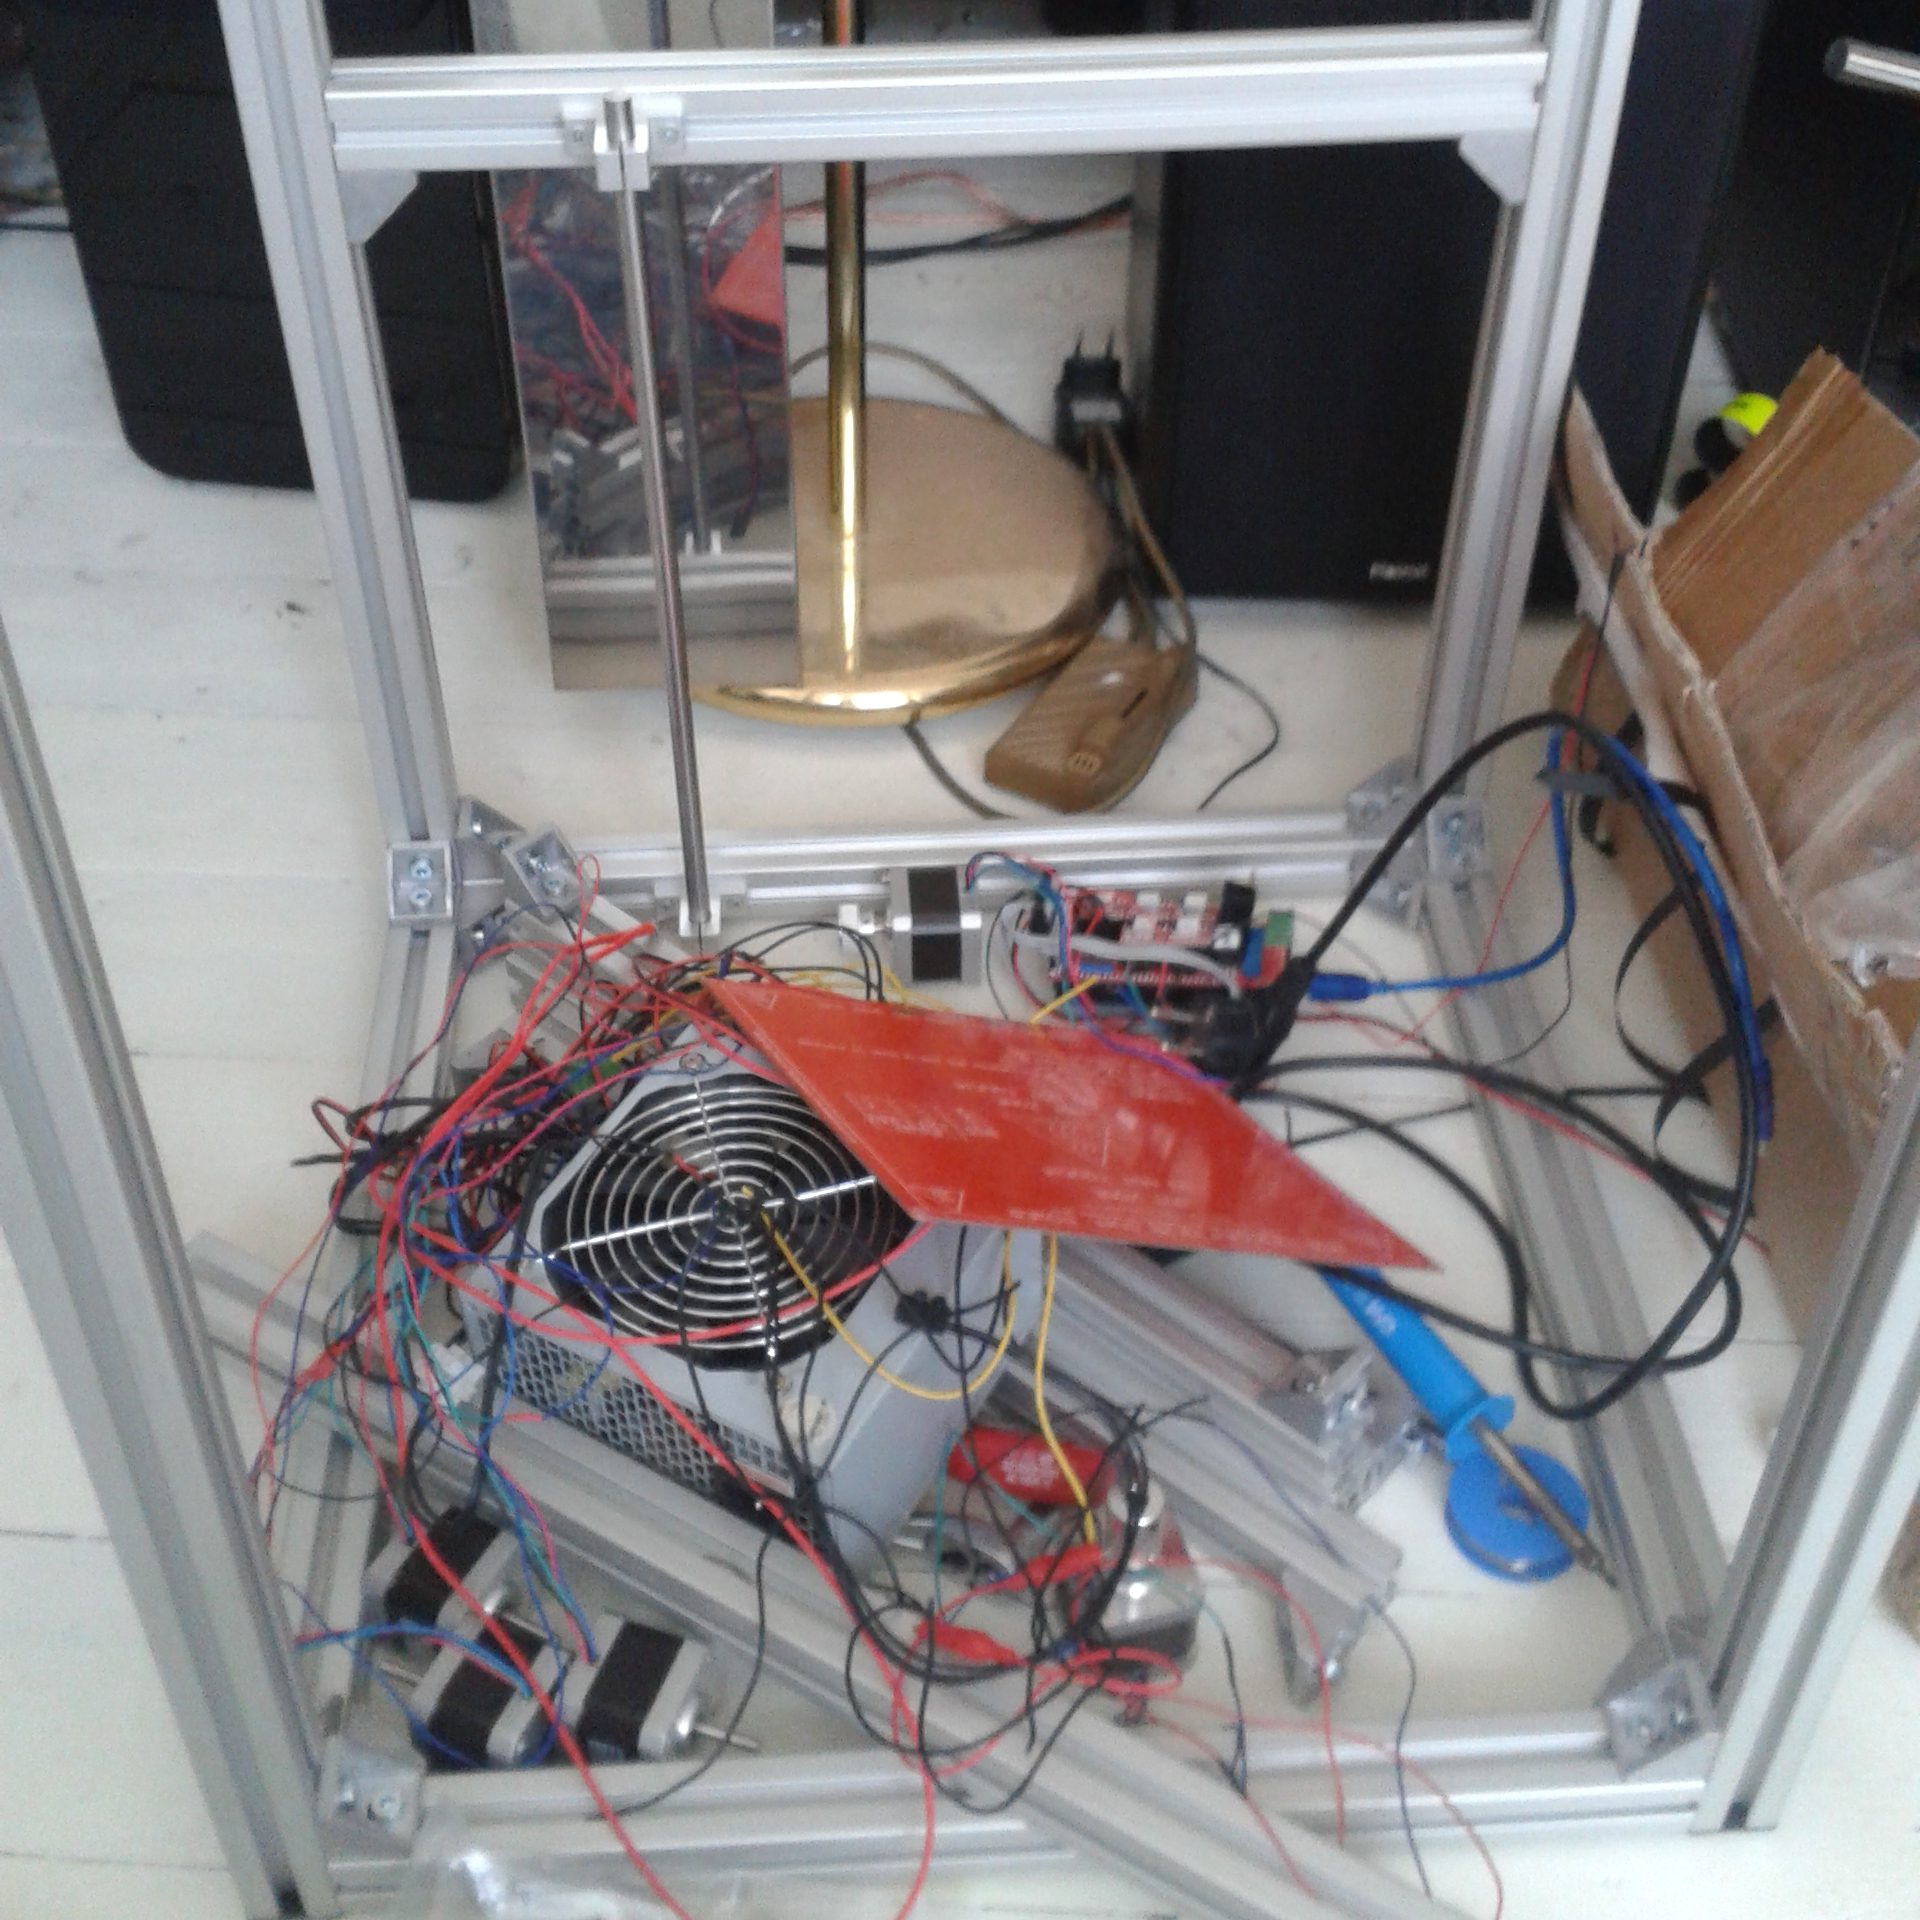
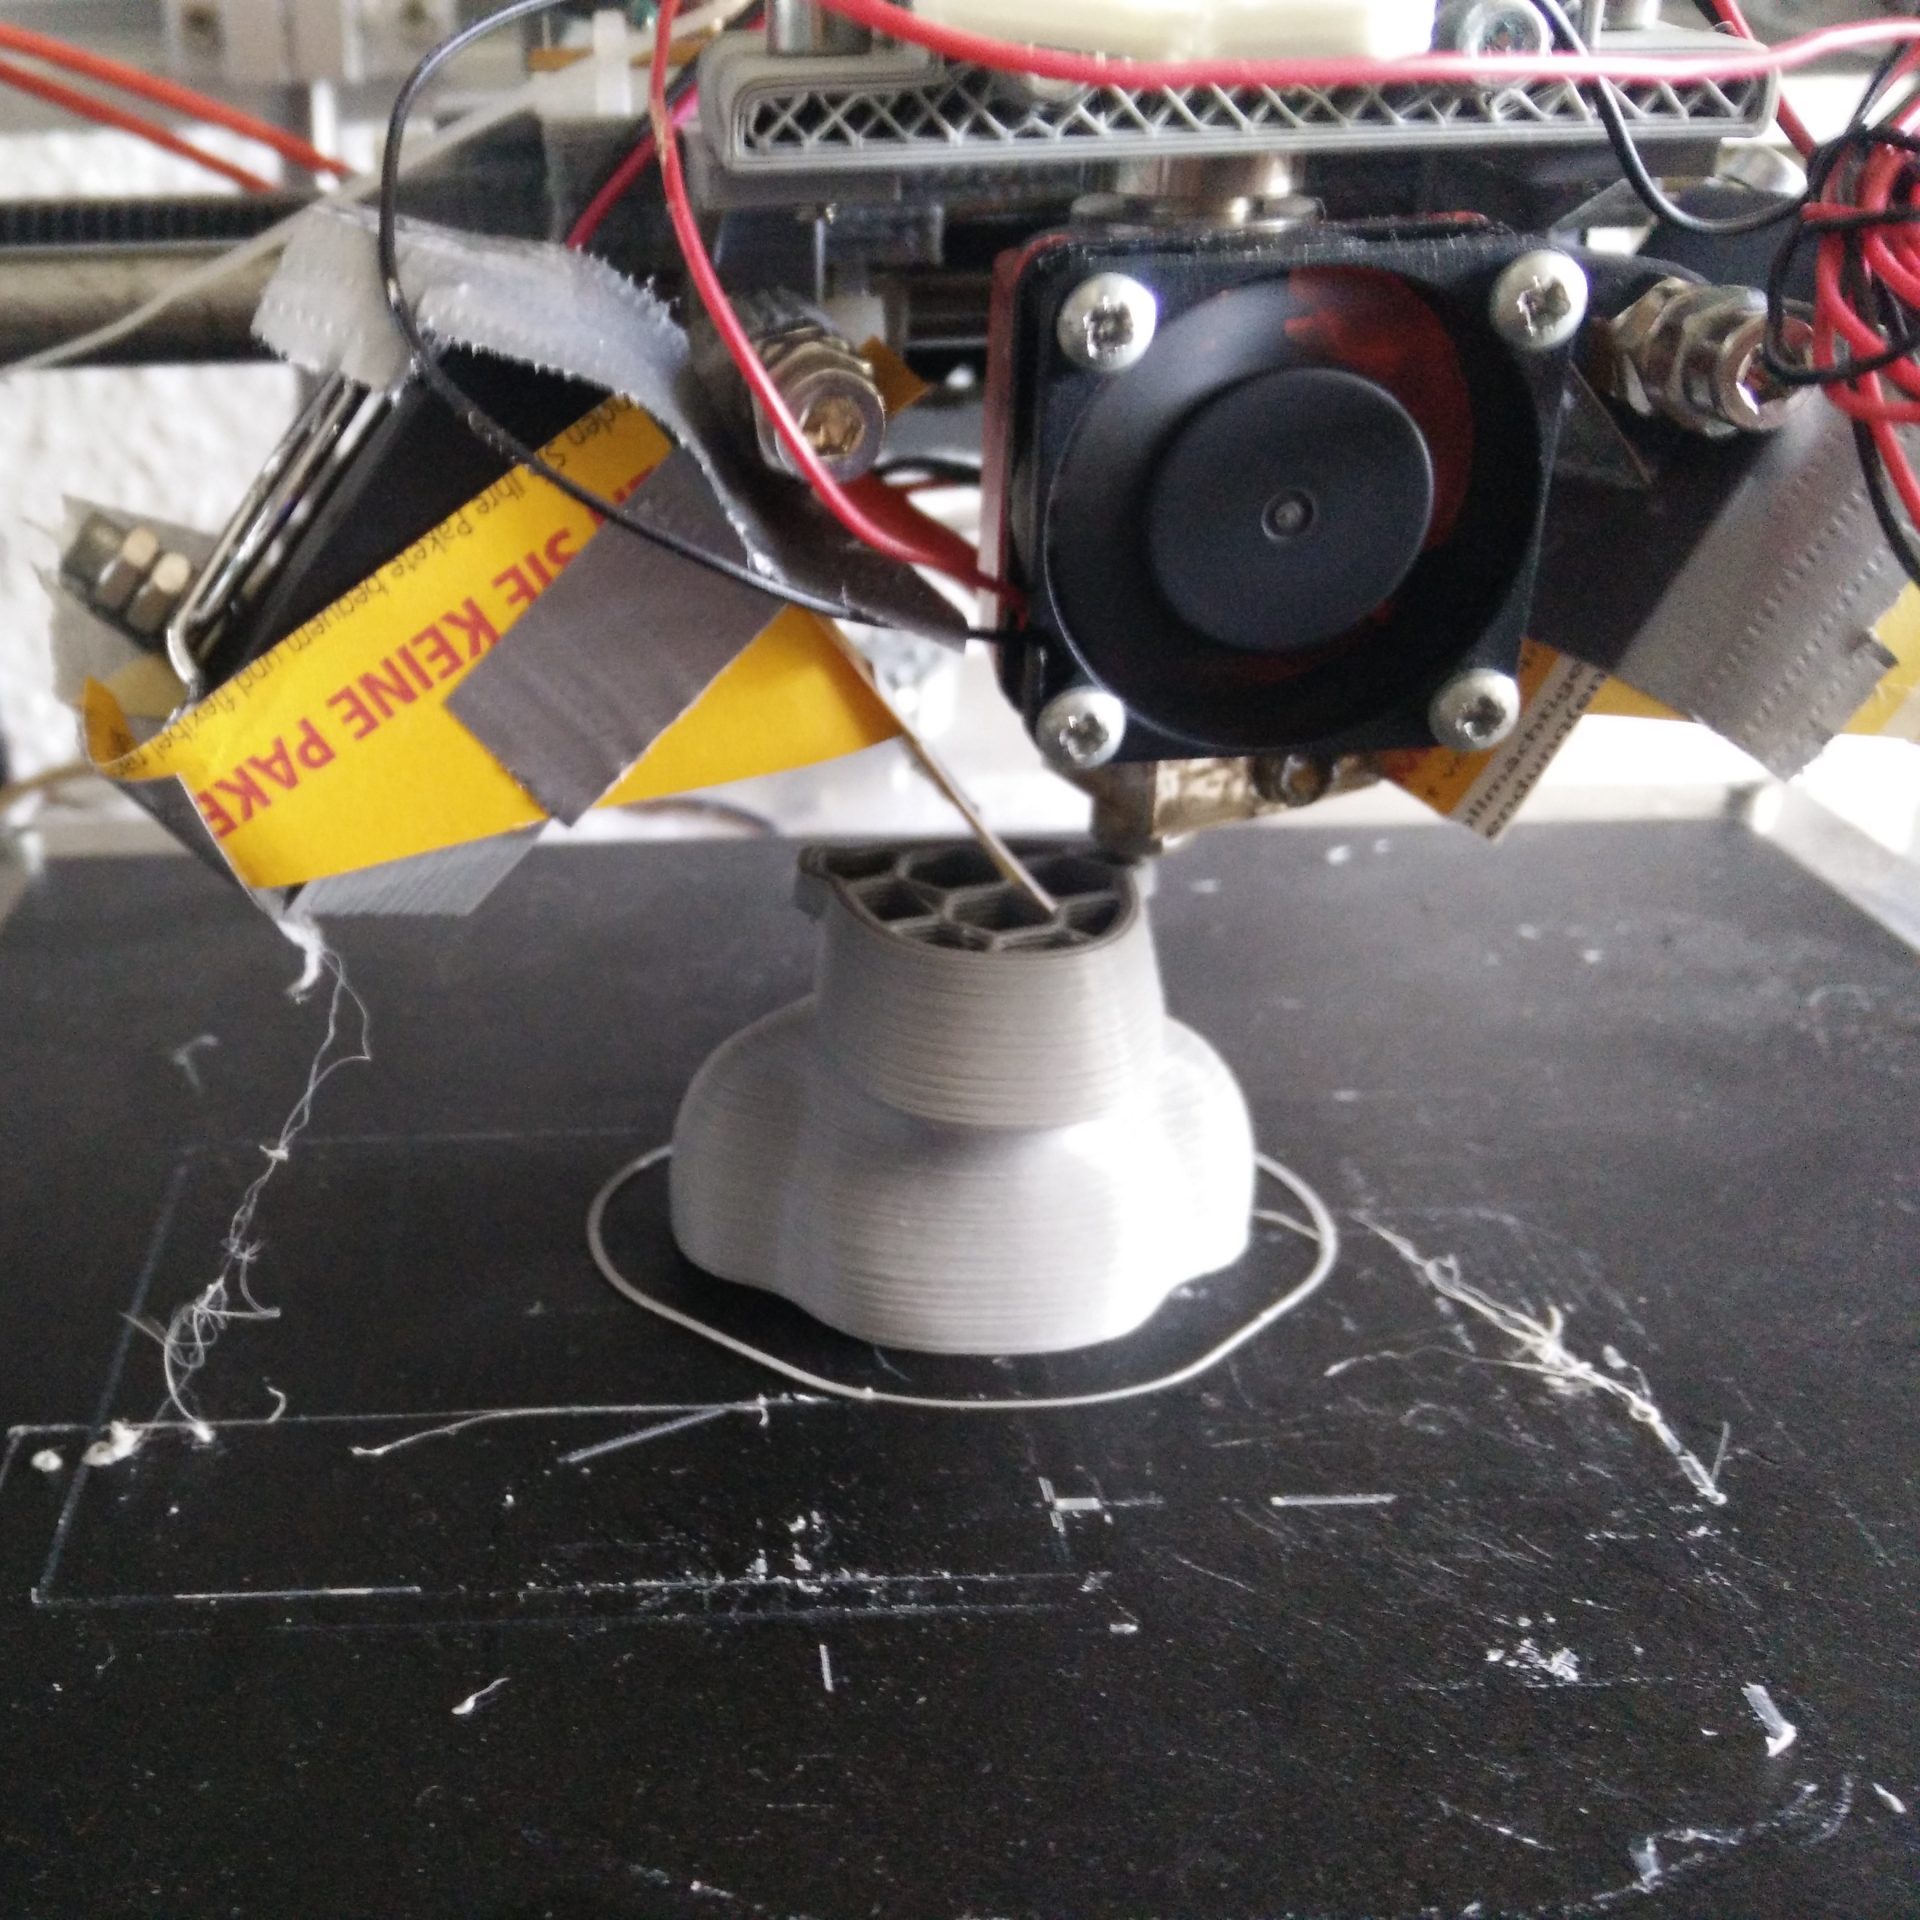
The first movement was very exciting for me. As you can see in the following video I improvised lots of things in the first version by creating custom fixtures and gluing components together to make them fit. I learned the lesson to be more accurate in my CAD drawings and to include all components in one assembly to test their fit. Prints looked awful in the beginning but improved over time since I became more experienced.
I had an aluminum plate water cut to mount the heated bed and the ball bearings for the z-axis. In the setup from the video, all axis are using hardened steel axis and linear ball bearings. I started with a PCB heatbed and glas with capton tape applied. I had lots of sticking issues and was constantly looking for a different solution that works for the kinds of filaments (PETG and PLA) and ended up using a PEI sheet which was a game changer for me.
Since then I have had no issues with prints not sticking to the build plate anymore. At some point, I replaced the PCB headbed with a silicon heatmate to improve heating time. I always wanted to use auto-homing. I started with a capacitive sensor and switched to an inductive one as soon as I used the PEI sheet.
The mechanical setup changed frequently and until last year I used the Ramps 1.4 board with A4988 stepper drivers which worked fine for me. The only reason I changed to the SKR board was the noise from the stepper motors. Over the years, I tried different mechanical setups. I tried different part cooling concepts and different holders for belts or stepper motors. In the beginning, I bought the E3D v6 hotend and I’m using it ever since. It’s one of few components which are still installed from the first setup.
The first milestone was at the end of my bachelor’s degree. I thought I finished the printer. If you ever built one by yourself you know – a printer is most likely never done. I laser cut an enclosure out of MDF, added light inside the cube, and made everything look clean.

Then Covid came and I had some time left over due to being in quarantine. There were two main points that were bothering me at this point. I wanted to use linear rails. Without any specific reason and only due to the fact they look more professional. And second, the visibility of the hotend was very limited due to how to hotend was mounted and the enclosure which was hiding the actual print progress. So it was time to change this and I recreated the mechanical concept for the hotend, enclosure, and x/y axis.
I came up with a design that included these features and started ordering parts. As soon as my quarantine was over I started printing and rebuilt the whole printer which led me to my current design. I’m sure I’ll make some smaller adjustments in the future but currently, it runs without any issues and prints spool after spool.
Conclusion
Building my own 3D printer is the biggest project I did so far. I started having no idea about mechanical parts and electrical components. I taught myself about building, designing, and building a 3D printer and how different components work together. Until this day I enjoy having my own printer and knowing that I designed everything myself.
I still use it on a regular basis for several projects. Many of them are featured in this blog. And yes, because you made it to the end of this post you will learn something unexpected – I even had some girls come over to have a look at the printer since it was something they have never seen before. To be honest, something I didn’t anticipate when I started the build.