
After finishing our home network my wife had the idea to put all the equipment in a server rack. And that’s what I did since everything was loosely placed in a cupboard. I decided on a 10″ rack because this gives me enough space to fit everything inside. I used the following components:
- 10″ server cabinet
- shelf – for the NAS
- power strip – with 4 sockets
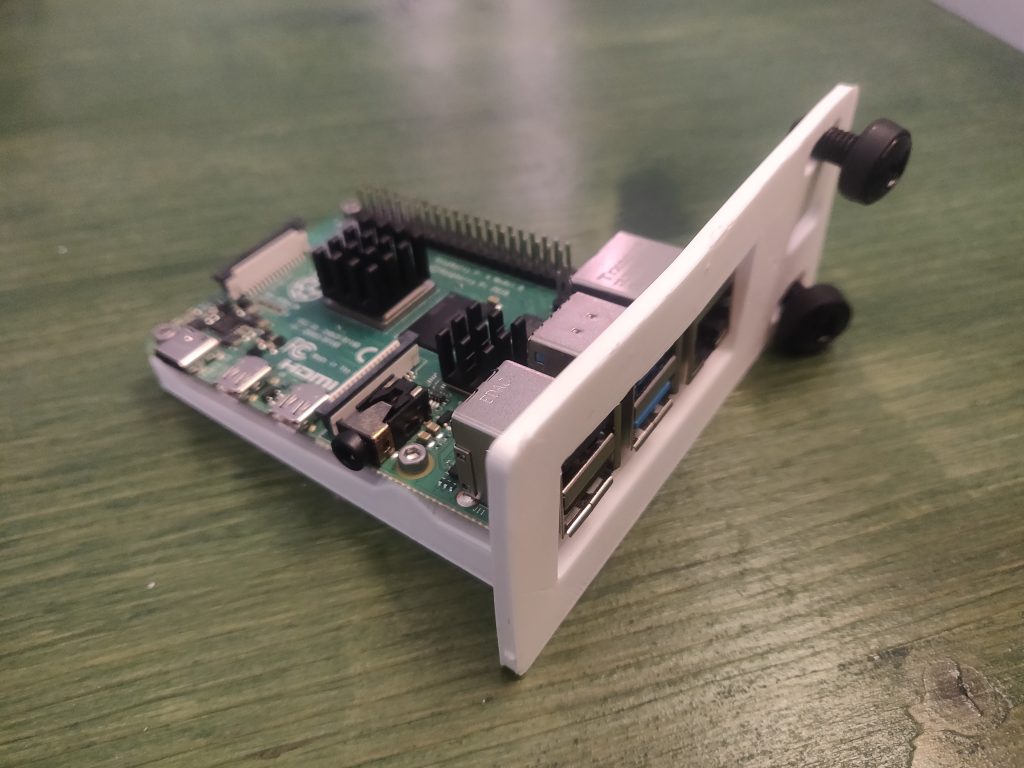
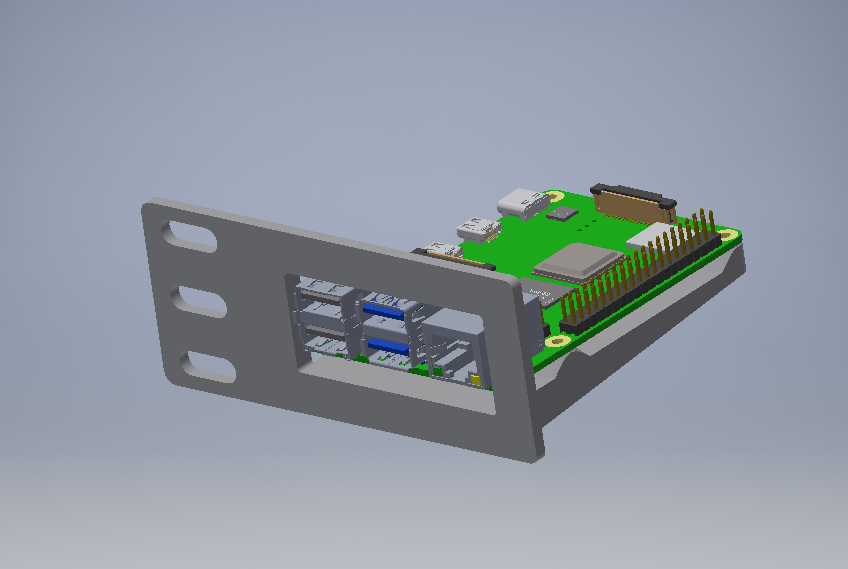
I couldn’t find any rack mounts for both sides of the cabinet for my Raspberry Pis so I designed my own version. The design can be mirrored to attach to both sides of the server cabinet. In the same way, I created a mount for my switch. I uploaded both to a GitHub repository.
The server cabinet is hidden behind a shelf in our living room. I placed the power strip on the bottom. I printed all mounts and installed both Raspberry Pis under the shelf where they have enough space for heat distribution. The right one runs Home Assistant with the Zigbee Stick plugged into one of the front USB plugs. The switch has its own 3D printed mount including guidance for all attached ethernet cables.
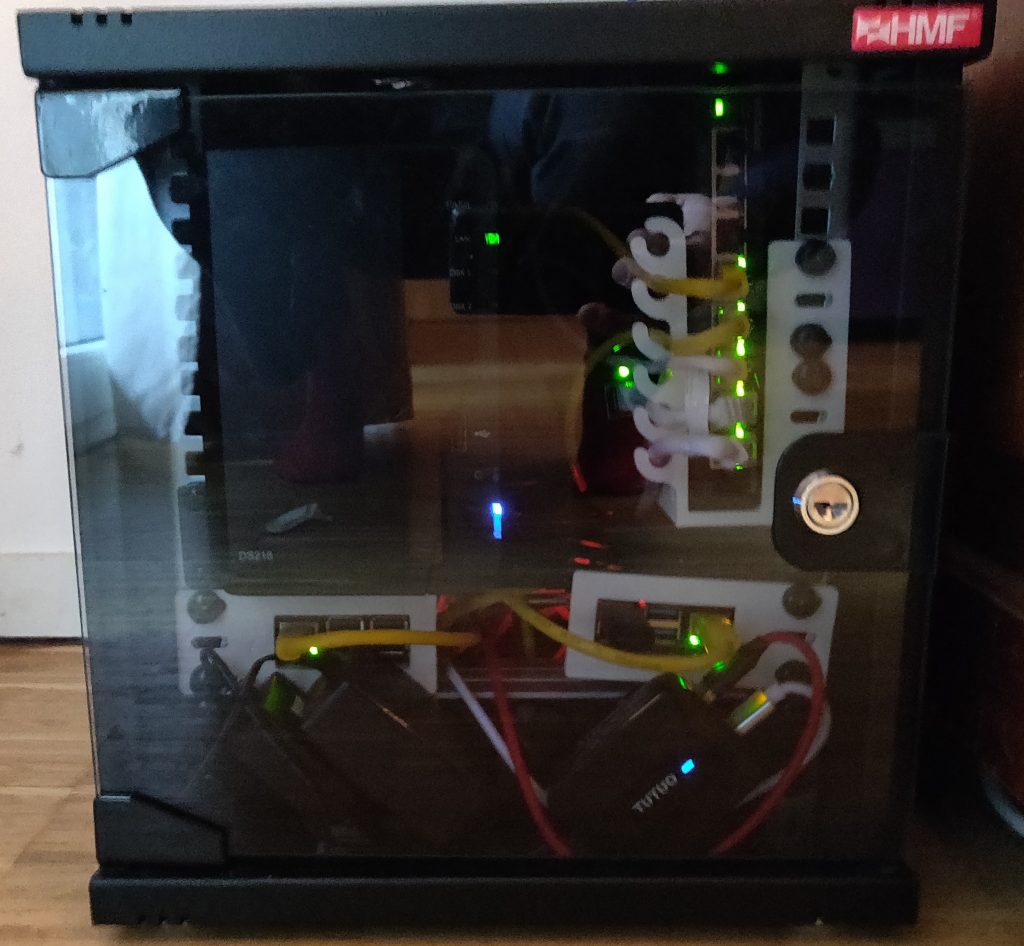
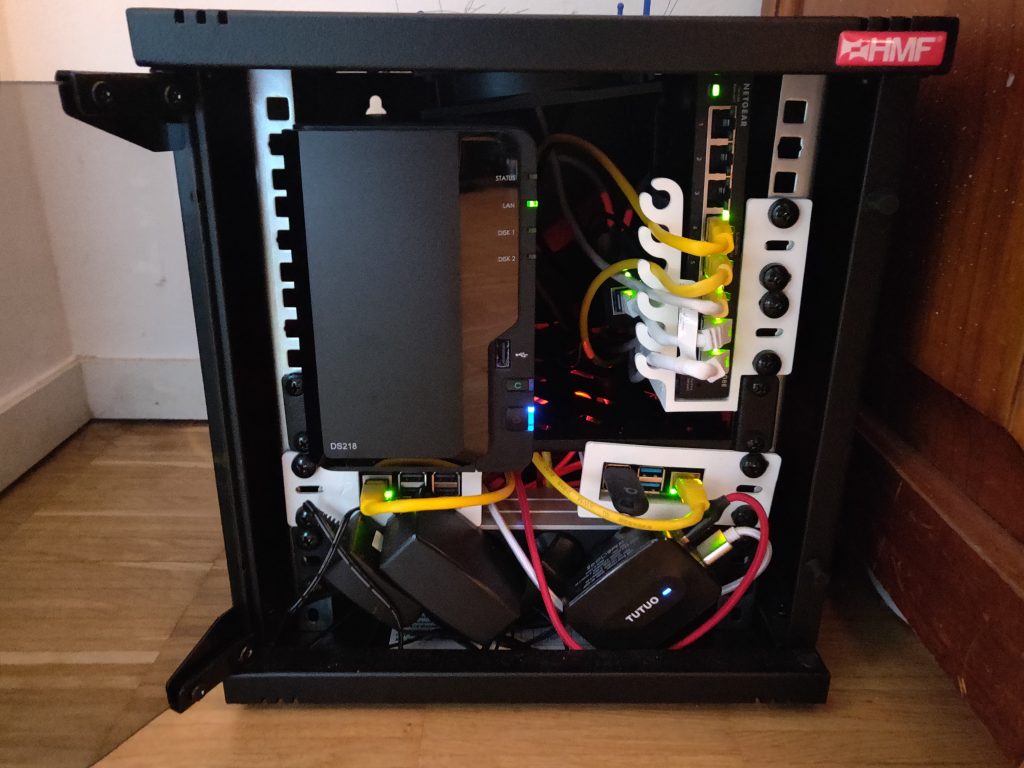
In general, all cables are in the back of the cabinet since there is the most space and I didn’t have cables in the correct length to mount them nicely in the front. So the back of the cabinet holds all the extra cable. For airflow, I mounted a fan on top of the cabinet to blow hot air out. It gets power from one of the Raspberry Pis pins. I have the NAS running in quiet mode and so far I didn’t have any heat issues.
Now everything is in one place and most important since the cabinet can be locked – it’s children safe.